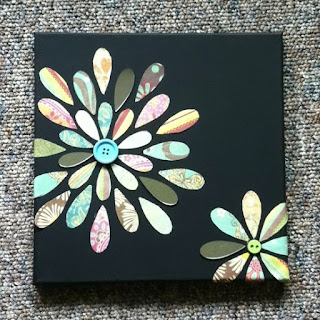
While on Pinterest (Where else?) I came across these cute canvases made using scrapbook paper, acrylic paint, and Mod Podge. I figured it was easy enough, so I set out to make one to go in our home. Or two :)
Supplies Needed:
Canvas (I used two 8 x 10) - I purchased a two pack at Hobby Lobby (Brand: The Fine Touch). They are not ever on sale (Reg. Price $3.99), but I used my 40% coupon (a crafter's best friend!). They are very reasonably proced in my opinion, and then with 40% off, waht's not to love?
Acrylic Paint - Watch for them to be 30% off at Hobby Lobby. Anita's Acrylic is my favorite. It has good coverage and there are so many colors to choose from!
Assorted Scrapbook Paper - I suggest purchasing when they are half off at Hobby Lobby (which happens every couple weeks)
Mod Podge
Two Foam Brushes
and some time.
Step 1: Paint the canvas. I recommend starting on the back, that way it is easy to check to see if the color is right, and to figure out the easiest way to paint a canvas (it was my first time, so i wanted to be cautious). The best brush to use is a foam brush that way you do not have any brush hairs and it will help cover the canvas more quickly.
I have discovered that two coats makes a nice even coat and looks smooth when painting a canvas (and most other things too, it's my general rule for paint 101). I also painted down a little ways on the side of the canvas so that way when I flip it over it can easily be painted the rest of the way. if you decide you only want to do one coat on the back, that should be fine
Step 2: Paint the front of the canvas. As you can tell, it is very "liney". This is why I covered it with two coats, I wanted a smooth finish with consistent tones all across it. Let the first coat dry completely before moving on to the second coat.
Step 3: While the paint is drying (or whenever you have time), cut out the petals. I had made a petal template and traced it on all the papers, but in the end, I ended up having a ton of extras. Don't forget to make the center of the flower as well.
Step 4: Cut out the petals.
Step 5: Paint a second coat on the canvas. As you can see, the color is much smoother and more even after a second coat.
 |
| I must caution you: make sure that there are no "globs" of paint along the edges. |
Step 6: After the canvas has dried and all the petals are cut out, lay them all out on the canvas to find out exactly where they should be placed.
After, my husband and I looked at it, and because I had used the 8 x 10 canvas, which isn't super big. He suggested that it would look more "flowery" with smaller petals, after seeing it laid out, I had to agree with him. So I went back and cut them down to a smaller size. I did not use a template for this, so they are all very different from one another.
Step 7: Glue the Flower Center on the Canvas using the Mod Podge and a foam brush. Use a different foam brush for the Mod Podge. You don't want to have globs of dried Mod Podge when you aer trying to paint something else. Make sure you have enough Mod Podge on the Canvas to hold it down. Go over it again with another layer of Mod Podge to seal it to the canvas.
Step 8: Mod Podge the next section of the canvas. It is best to put the petals on in small sections, I did rows around the center. After each section, go over the petals with more Mod Podge.
Step 9: Keep adding layers of petals until the flower has the fullness that is desired.
As you can see, I just keep going around section by section, and continuing to coat with Mod Podge.
Step 10: After all the layers are Mod Podged to the canvas, go over the whole canvas, including any areas that don't have any design, as you want the canvas to have a smooth, even gleam.
Step 11: After the Mod Podge has dried, probably 3-4 hours, put a final coat of Mod Podge on. You don't have to do a 2nd coat, but I always like to make sure that my projects are sealed!
 |
| Scrapbook Paper Flower Canvas |
This is after the two coats of Mod Podge had dried. I absolutely love the way it turned our. As you can tell, all the petals are cut differently, but that is the nature of a flower, no two petals are the same.
The Canvas in the center is the one that my sister in laws got us, so we chose the colors to compliment and tie in with the decor of our living room.
You can create just about anything with Mod Podge, Canvas, Acrylic Paint, and Scrapbook Paper.
Here are some neat ideas for Canvas Wall Art that I found.
I love this Christmas tree created using a blank canvas and scrapbook paper. I may have to make one for our home this Christmas season!
Here is a neat way to create a flower, but use a button as the center.
This beautiful feather is so whimsical.
or a neat way to show your family in a "Family Tree" Canvas
There are so many options to create. And with Mod Podge, the possibilities Re nearly endless! During my search, I also saw several examples that used fabric instead of scrapbook paper, another great alternative!
Enjoy your imperfect slice of life!


