I've said before that Fall is my favorite season (and it is), but I also so love decorating for the Christmas season as well!
So, this summer, when crafting with one of my friends, I was punching circle shapes out of glittered scrap papers to use in our scrapbooking endeavors, and I had a brilliant idea. I would create a Christmas tree with ornaments using glittered scrapbook paper.
It would be perfect. So, it was decided. I would create this most perfect canvas!
 |
| Joy to the Word Christmas Tree Decoupage Canvas Tutorial visit imperfectsliceoflife.blogspot.com to view tutorial |
I had purchased severl 11x14 canvases awhile ago for several projects, yet never got around to doing them, so I used one of the for this project.
I purchased a 6x6 mat stack of glittered paper at Pat Catan's for $4.47
I also purchased a 6/10 inch circle punch ( I purchased it at Hobby Lobby for half off - it came in a 3 pack with a small heart and small star shape punch)
I also purchased a 1 inch star punch from Hobby Lobby as well (again half off!)
And I had Gloss Mod Podge left over from other projects.
Colored card stock is never in short supply at my house, so I did not purchase any, as I had plenty to pick from.
These are the pucnhes I used - these two were the first punches by The Paper Studio I have ever used ( I can't believe I waited so long), because they make scrapbooking and crafting soooo much fun!!!
Since these, I have purchased another 5 punches to use in my endeavors!
To start with, I found a Christmas tree image I liked online and printed it to use for my stencil for creating the tree.
So I traced the tree onto the green paper, and the stump on brown, and cut them out.
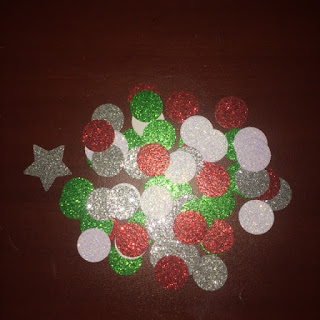
Here are the glittered papers I used to create my "ornaments". I select green, red, white, and silver as our Christmas tree is decorated in these colors, and I love it!
I punched my little heart out while I watched a Hallmark movie on TV, they are my favorite!
Then I broke out the good old fashioned Elmer's glue to glue the tree together.
And I added the star to the top - no Christmas tree is perfect without the star atop.
A perfectly decorated Christmas Tree!
I was ready to attach it to the canvas..
The only problem was that I had neglected to paint the canvas, so I had to take care of that.
I chose to paint it white. Snow White. I used Apple Barrel's Snow White (purchased at Wal-Mart for $.50)
Once the paint was dry, I was able to get back to work. I Mod Podged the Christmas tree to the canvas.
But, there was an awful lot of white space, so I decided that I'd use the handy-dandy Cricut (quite possibly one of my favorite tools!) to cut some letters to fancify the canvas even more.
But what should it say???
I am a firm believer in the true meaning of the word Christmas.
So what is more perfect than "Joy to the World!"
I used glitter paper, because who doesn't love a little extra glitter at Christmas time?
And I had it cut the letters "Joy to the" at 1.5 inches, and "World!" at 2 inches.
I carefully Mod Podged the letters on, as you can see it spread a little glitter around on the canvas, but you won't hear any complaints from me about that!
Once the Mod Podge had dried, I Hot Glue a perfectly sparkly red and green Chrismat ribbon I picked up at Hobby Lobby as a hanger. And it was ready to be hung on the wall with care!
Take time to appreciate the holiday season, and enjoy your imperfect slice of life!


No comments:
Post a Comment