I've seen lots of neat ideas for phrases to put on pieces of painted wood. And will all the dice I've been making, I've had 4x4s laying around. I saw a cute picture on a blog of blocks saying Let It Snow on blue blocks. Super cute and super easy. So I cut one of the 4x4s (actually, my dad did) and purchased my paint. It happened to be at a time when paint samples were only 99 cents at Lowe's for an 7 oz bottle. That's way cheaper than I can get acrylic paint. So I decided I would just use latex wall paint. What would it hurt?
I had my dad cut the 4x4s into 1 - 12 inch length, 1 - 10 inch length, and 1 - 8 inch length.

Here are the paints that I selected to complete the blocks.

First step, painting the blocks. I used the lightest shade of blue for the top block ( 8 inch block )

I painted the top and partially down each side, and then let it dry.
 |
| Valspar Tidal Basin for 8 inch top block |
 |
| Valspar Pool Party for middle 10 inch block |
 |
| Valspar Deep Sea Diving for bottom 12 inch block |

Blocks partially painted ready to dry. Once dry, I flipped them over and painted the remaining part of the blocks.
 |
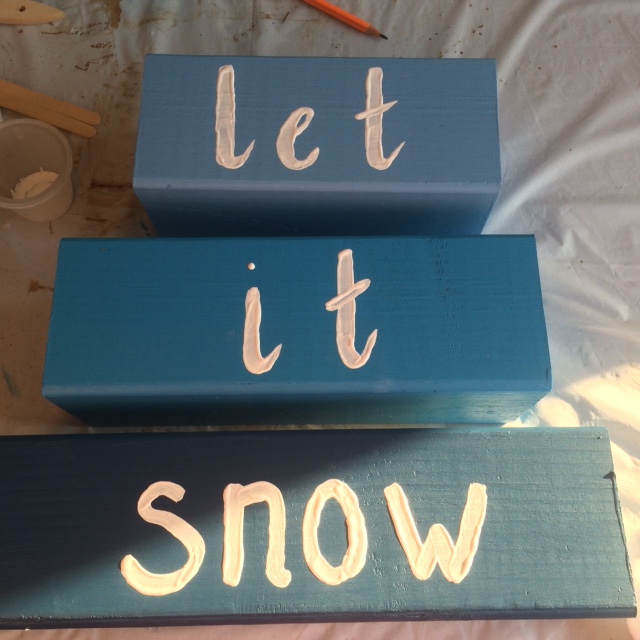
| Blocks ready for lettering |
Before I painted the letters on, I just lightly drew them on the blocks to make it easier to paint them on.

After the paint dried the first time, I went over it another time to make sure I had even coverage.
Next step: Snowflakes.
I put the snowflakes on the middle block because of the extra space on the ends.


Let is Snow! And enjoy your slice of imperfection :)
No comments:
Post a Comment